|
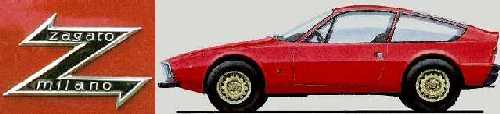
Over 15 years fight with the tinwormClick on thumbnails below for larger pictures. Disclaimer: This description is intended as a guide only. All the work described should only be undertaken by skilled and experienced persons. This is especially the case with the brakes and steering unit - yours and other lives may depend on this components. If you feel not competent enough to carry out the work please take your car to capable service centers. In any case the author cannot be made responsible for damage to your or other people property or lives. In June 1983 I couldn't resist but made a small boys dream become reality - I bought my Junior Zagato 1300. This car was my dream car ever since I was seven years old and my father took me to an Alfa Romeo Dealer in order to pick up his brand new Berlina 2000. Seeing the Zagato in the dealers show room and telling my daddy: 'When I grow up I will have one of these cars' was one thing. Well now I'm grown up... In fact I should be a little more honest: I bought the sad remains of what was once, when it was manufactured a beautiful little sports car. It left the Zagato-factory in Terrazano di Rho near Milan in AR 014 "White Zagato" finish with the destination Alfa Romeo Frankfurt. The car must have been considered as something unspectacular by the previous owners because they managed to wreck it in less than 6 years on the road. The pictures below were taken when I bought the car. |
|
 |
The car was jammed with spare parts (also for other Alfa Romeo models). It was repainted-yes,painted!- in black, most probably to better hide the rust. |
| The whole body was also covered with grey primer dust. I was very lucky that very rare brand new original door sills came with the car. Note the dents in the front section. | 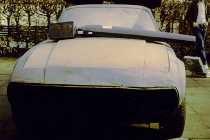 |
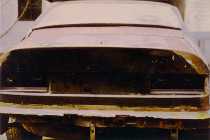 |
The rear panel was welded in a very unprofessional manner to the body after a tail crash. The traces of the accident in the lower body section were not rectified. I used a dozer after sandblasting in order to bring the platform back into its original proportion. |
| After dismantling the remains and removing the complete
body panels I sandblasted the chassis and started to weld. I cannot recall how many square meters of milled steel went into the chassis but I do recall that the local steel dealer treated me more friendly with every visit to his shop. The most challenging job was the complete reconstruction of the boot pan. Once the boot pan was ready the rebuilding of the rear section could begin. At an early stage of the restoration I decided to carefully modify the car where necessary. One thing I deemed necessary was the integration of an oil cooler. Another tricky job was the modification of the fire wall to accept the power brake servo for the dual circuit brake system as standard in the 1600Z. Purists may cry out loud now but I'm not willing to drive cars with a single circuit brake system and it's my life after all... The front section was very devastated but not very complicated to rebuild. The doors were in need for some welding. So the years went by and slowly, slowly the Zagato regained it's original shape: A steel skin tightly stretched over an engine. The suspension needed a complete overhaul as well as the steering. Now the body is sprayed in AR 737 grey metallic. Front and rear axles with suspension are completely new,including brakes. Engine and gearbox completely overhauled are 2000 ccm with rear axle 10/41 ratio. The pictures below are giving you an impression how the car looks like today. |
|
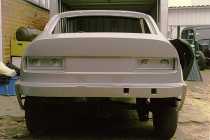 |
The rear panel you see on this picture is the same shown above. I carefully cut it out, stripped the paint and sandblasted the rusty parts. The lower section underneath the rear panel is shift made. |
| I was able to purchase a used but very good right front wing. The original ones were so badly rusted that they couldn't be repaired. | 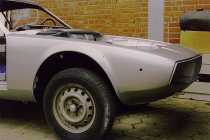 |
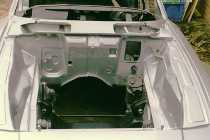 |
Here you can see the modification of the fire wall in order to accept the dual circuit brake cylinder with the power brake booster. I used a part of a Giulia Super Nuova fire wall. This modification was very time consuming. |
| Between this picture, taken the day after the car was sprayed and the first picture on top of this page lies a time span of over 15 years... | 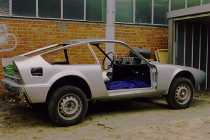 |
| Back to Main page | |